- Home
- Trapping Moles
- Victor Plunger Trap Review
Victor Plunger Trap Review
This post may contain affiliate links so I earn a commission.
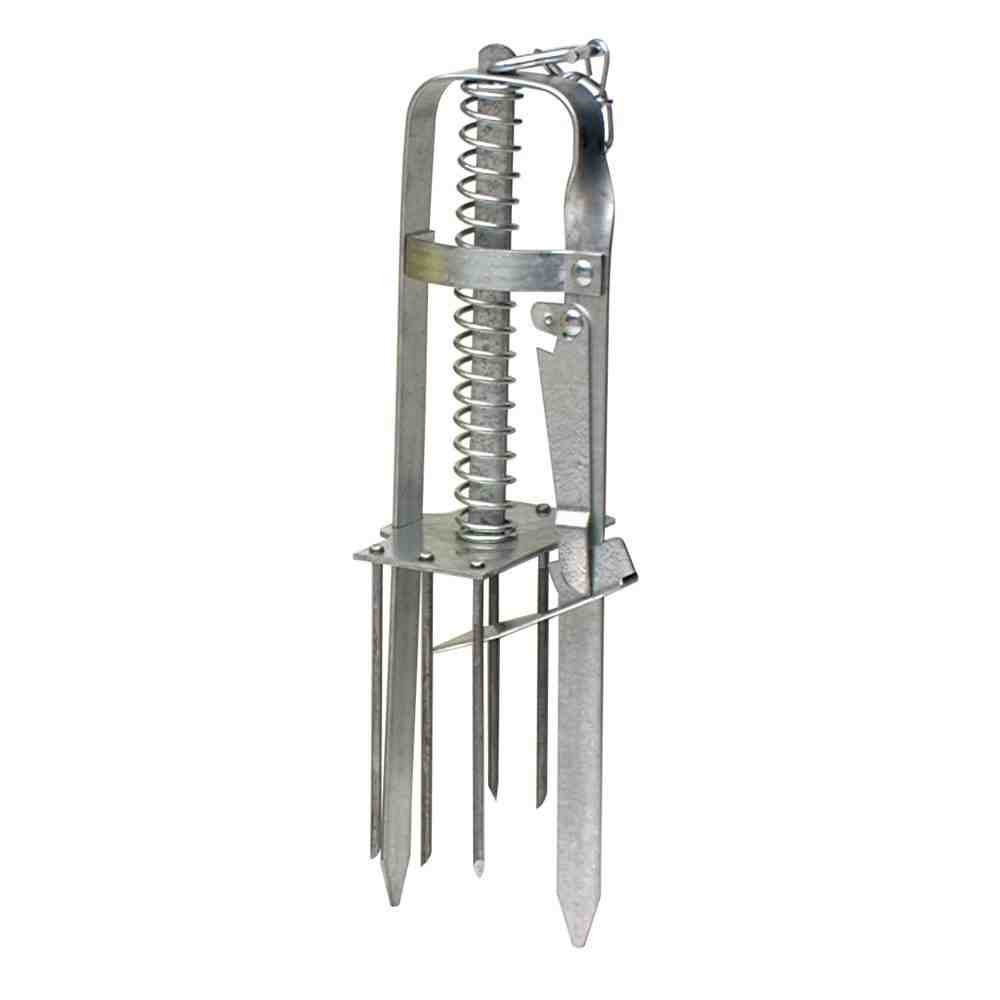
This Victor plunger trap review is designed to give you a basic understanding of a successful mole trap that has been around for a long time.
Also referred to as a harpoon trap, or a spear trap, the plunger trap uses multiple sharp spears that pierce through the ground and the mole when activated, killing the mole.
This style of trap works really well in shallow mole runs that are slightly below the surface.
If you have deeper runs, the Victor Out O'Sight scissor trap is a better choice.

In recent years the design of the classic Victor spear trap has been modified into the new 0645 model.
The older classic design that many of us have used in the past seems stronger, and it's a heavier duty trap compared to the new 0645 model.
The steel on the newer version is slightly lighter weight but overall the trap functions the same.
When used correctly, the plunger trap can be very effective.
However, just like any other form of mole trap, proper location and setup is critical if you want good results.
Setting The Trap - Victor Plunger Trap Review
In order to successfully trap a mole you must set the trap on an active runway.
It only makes sense right?
You can't trap a mole that's not there.
If you look around your lawn you will probably see numerous mole tunnels running everywhere.
Start off by finding the longest, straightest run that appears to be connecting two areas of tunnels, or one that's running along a wood line or foundation.
This part of the run is typically used the most.
Stomp down a small section of the runway and check it the next day.
If the section is raised, the mole has passed through and the runway is active.

To set the plunger trap, use your heal or the palm of your hand to depress a small section of the runway.
You basically want to create a small divot that will obstruct the runway.
This part of the setting process in the Victor plunger trap review is very important.
You must create the divot obstruction in the runway so as the mole passes though, it raises the divot which in turn presses against the trigger pan activating the trap.
On average, the trigger pan will sit about 1/2 inch or 1 inch down below ground level inside this depression.
Next, position the trap over the depression you just made and the long steel legs of the trap should straddle the tunnel.
Once the trap is aligned, slowly push the legs of the trap into the ground.
Here's the next important step in our Victor plunger trap review.
As you slowly push the trap into the ground, pull back on the spring/spear device half way using the setting T on the top, release the T and let the spikes strike the dirt.

Do this 2 or 3 times as you slowly push the trap into the ground.
This basically provides a pilot hole for the spikes to go into, reducing the possibility of the spikes becoming bound up when the trap activates.
The final step is to fully pull back on the setting T which locks the trigger latch into the pan, setting the trap.
Once set, the trigger pan should be resting inside the divot you created earlier.
That's it, your done!
Overall - Victor Plunger Trap Review
Although it may take a few times to get the hang of setting the trap, the Victor plunger trap is a really easy and quick set to make.
When the trap is sprung remember to slightly dig up the dirt around/under the trap when you remove it from the ground.
If you simply pull the trap out of the ground, the mole will probably slide off the spikes and stay in the tunnel.
This is probably not a big deal for most people, but if you not aware of the possibility of this happening, you might just think the trap mis-fired and won't realize you actually trapped a mole, it just fell off the trap when you pulled it out of the dirt.
With a little practice making the set on an active shallow run, you'll find the trap is very effective.


