- Home
- Trapping Rats
- How to Set a Rat Trap
How To Set A Rat Trap
This post may contain affiliate links so I earn a commission.
Learning how to set a rat trap to eliminate unwanted rats around your home is actually pretty easy.
The traps are cheap, easy to find and more importantly, they work really well!
The Victor snap trap is probably the most widely used rat trap on the market.
Since the traps are so inexpensive and effective, it's typically a top choice for professionals.
However, the snap traps have one major downfall.....setting them without snapping your hands or fingers!
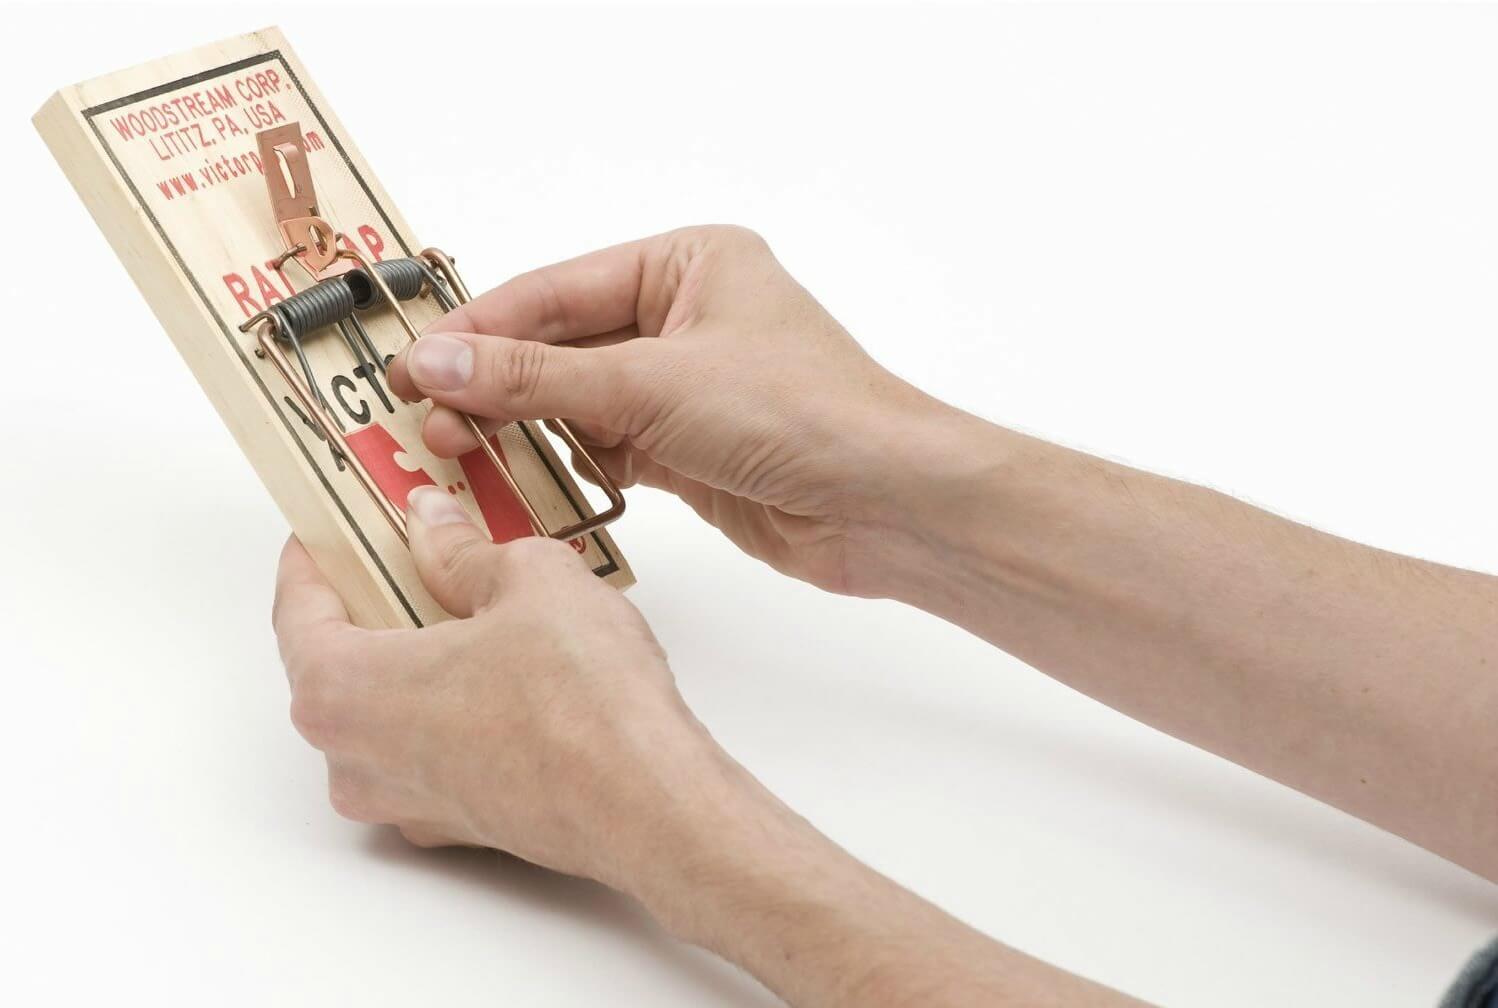
Let's face it, even setting a mouse trap can make a lot of us pretty nervous.
Since rat traps are much stronger than the smaller mouse traps, you'll want to make sure you use extra caution when setting them.
Don't let their size intimidate you though.
When set properly and carefully, you can safely use these traps and your rat infestation will soon be a thing of the past.
How To Set A Rat Trap
Victor snap traps can be found just about anywhere.
I purchased this trap at a local farm and garden store for under $2.
When you remove the trap from the packaging you'll notice a small metal staple that holds the arm bar to the wooden trap base.
The arm bar is basically a straight metal bar with a small bend at one end that holds the spring loaded kill bar in place and hooks to the traps trigger.
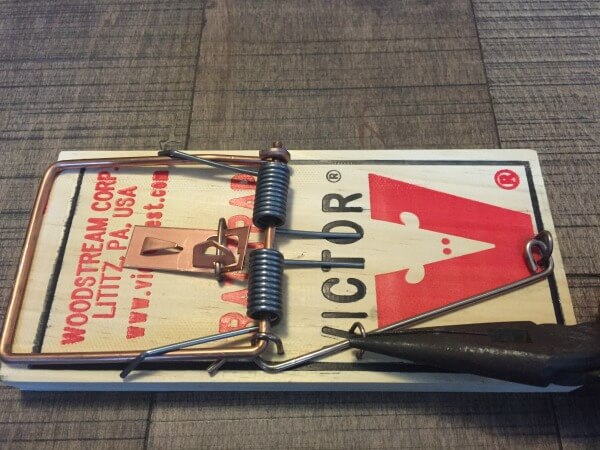
To remove the staple, simply use a small screw driver or a set of pliers.
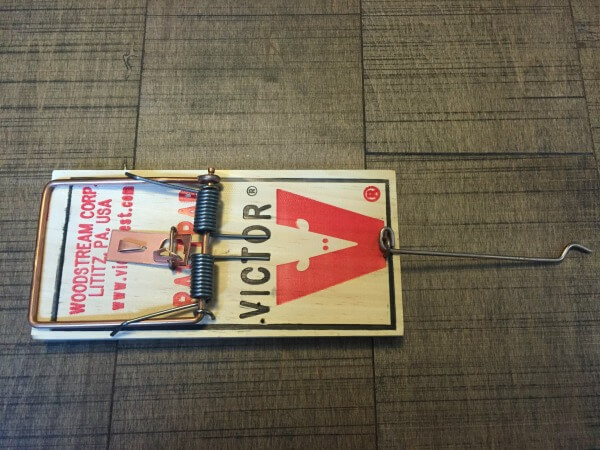
Once the staple is removed, take the arm bar and hang it off the back of the trap as shown in the picture.
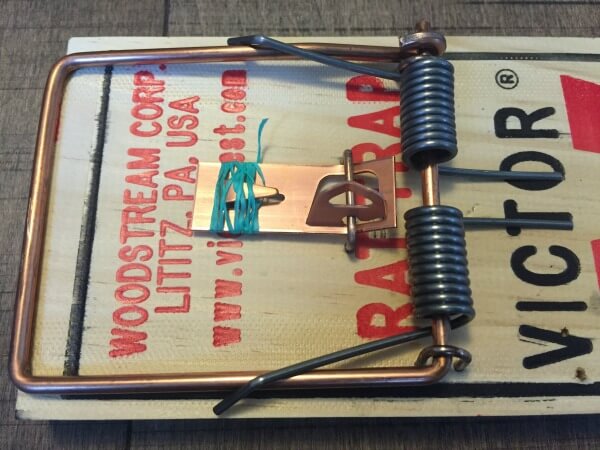
The next step in learning how to set a rat trap is to bait the trap.
Bait is placed on the copper colored metal bait pedal.
For bait, I like to use peanut butter.
Peanut butter works great because it sticks easily to the bait pedal.
Here's a secret tip.....before placing the peanut butter on the bait pedal, take some dental floss and loosely wrap it around the bait pedal.
The loosely wrapped dental floss will catch the rats teeth as they eat the peanut butter, putting more resistance on the bait pedal and reducing the amount of stolen bait from your trap.
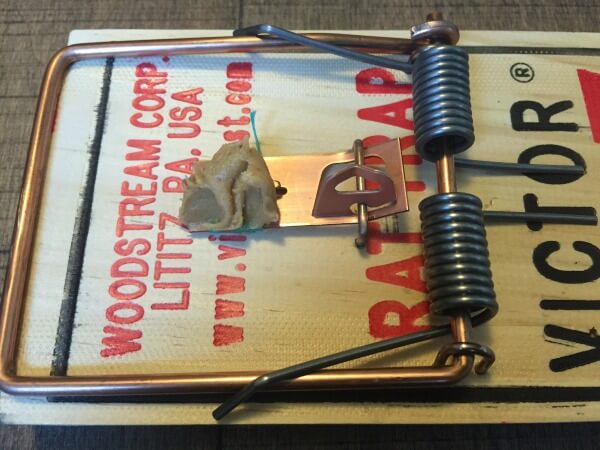
Once you have the dental floss loosely wrapped on the bait pedal, smear some peanut butter over the dental floss and the trap is now baited and ready to be set.
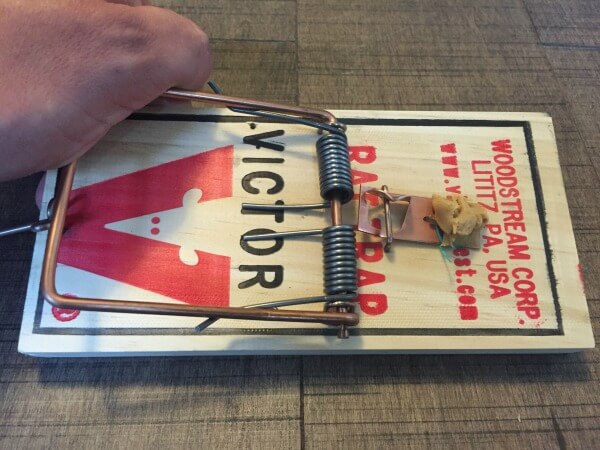
Once the trap is baited, carefully pull back the kill bar and hold it in place by using your palms on the corner of the trap, making sure to keep your thumb and fingers outside the strike zone of the kill bar.
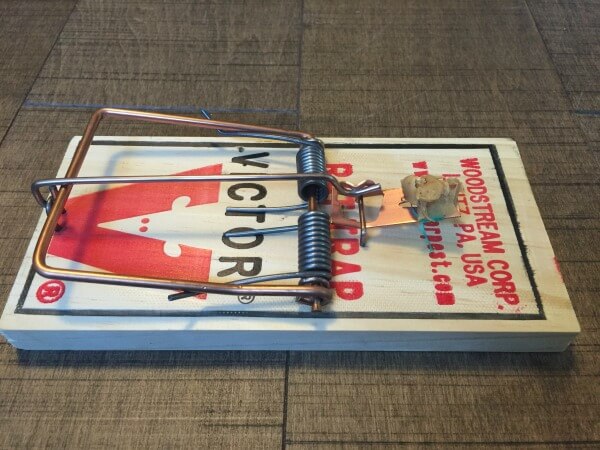
Next, take the arm bar and place it in the notch on the bait pedal.
The arm bar has a small bend that will hook around a small notch on the bait pedal.
Slowly let some pressure off the kill bar with your palm to give enough tension on the bait pedal to set the trap.
Do not release your palm from the kill bar until you're certain all your fingers and thumbs are safely out of the strike area.
If you're going to catch a finger, this will be the time, so double check to make sure nothing is in the strike zone.
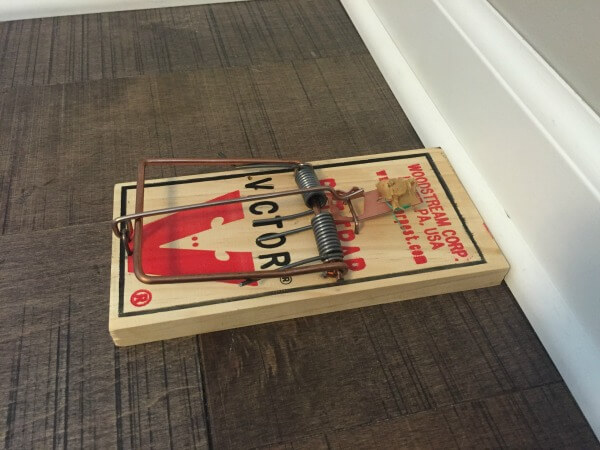
Once the trap is set, carefully place the trap adjacent to a wall where you have found rat activity.
Rats do not like to run across open spaces so don't set the trap in the middle of a room.
Place it along a wall, near a corner, behind some boxes or debris, or anywhere else that's secluded where the rats feel comfortable and travel frequently.
If the snap trap will be exposed to children or pets, cover the trap with a small box with an opening that will allow the rat to enter, while keeping the trap protected.
Remember, a snap trap is designed to be a lethal trap so they can cause injury to any children or pets that encounter them.
How To Set A Rat Trap - Overall
Leaning how to set a rat trap can be slightly tricky in the beginning until you become comfortable with the trap.
However, after you set the trap a few times and get over the initial "scare factor" of a snap trap, it's actually really easy and safe to set.
Plus, it allows you to effectively eliminate rats yourself for just a few dollars, which is a lot cheaper than hiring a professional.

